Multitrack recording with Xer Mixa and MIDI
Multitrack recording is a useful technique if you want to do some post processing on a Eurorack jam before it’s released. When we released Xer Mixa, a number of users asked if it was possible to do multitrack recording with it. While Xer Mixa doesn’t have multitrack output capabilities – due to the analog architecture of the mixer, it isn’t possible to separate the channels – there are some creative ways to create a multitrack recording in your DAW using Xer Mixa and MIDI. All you need is an audio interface with a lot of inputs, some mults, and a MIDI-to-USB adapter.
Patching and recording
To do multitrack recording, you’ll need an audio interface with a lot of inputs. In the example video below we’re using an Expert Sleepers ES-9 in the rack, but any audio interface with lots of inputs will work.
You’ll also need a lot of mults: one mult for every input used on your mixer. The good news is that passive mults will generally work just as well as active/buffered mults in this particular patch (and in most audio-path patches) so you can use star splitters, Stackcables, or whatever other mults you have lying around.
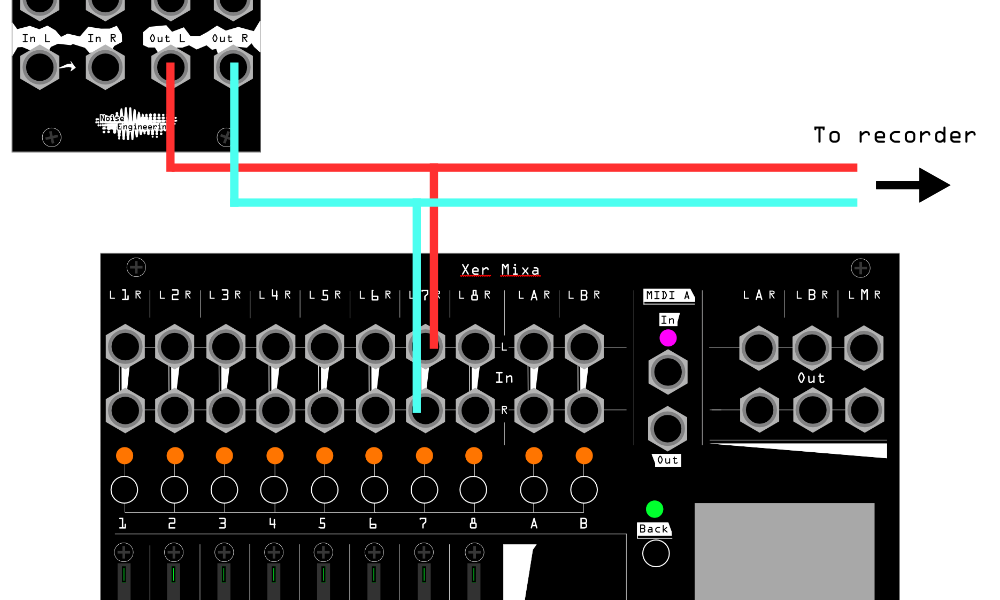
The patch itself is quite simple: for each channel used on Xer Mixa, mult the input (or pair of inputs) to an input (or a stereo pair of inputs) on your audio interface. If you’re using aux sends, make sure you mult the aux returns to your interface, too. I also like to record the stereo Main output as a reference for later.

And that’s it for the audio setup!
MIDI
Since our audio recording is prefader, we’ll be using the MIDI output of Xer Mixa to record any level or mute changes we make onto our multitrack recording later on.
Many audio interfaces have MIDI-to-USB capabilites, but if yours doesn’t, you’ll need a MIDI-to-USB interface to record MIDI into your DAW. Patch the MIDI out of Xer Mixa to your interface, and we’re done patching – all that’s left to do is set up our DAW!
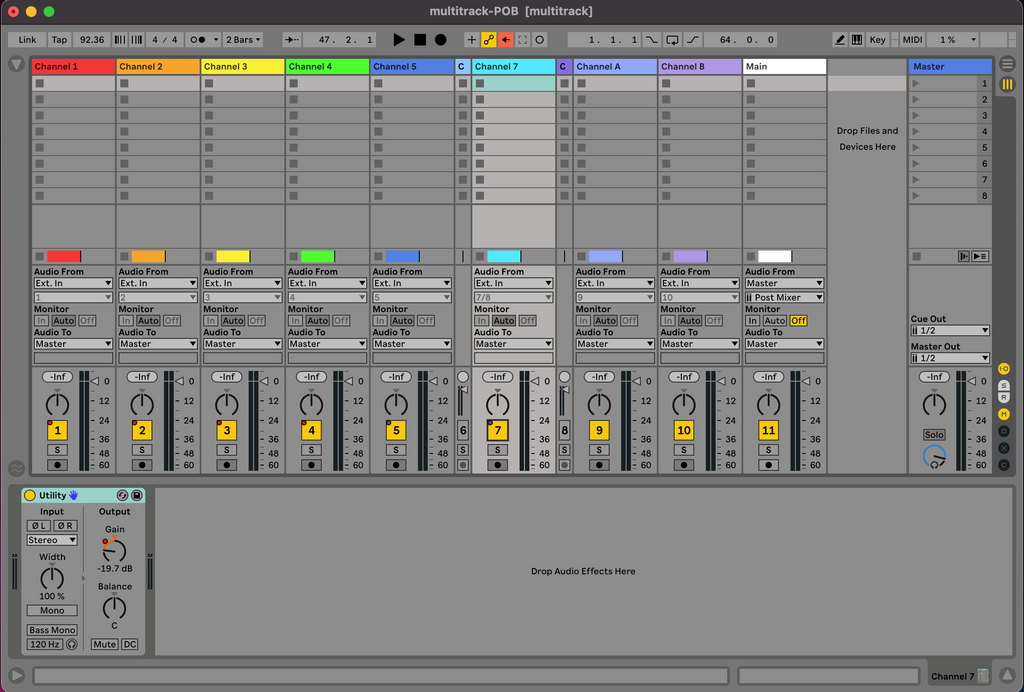
For this example, we’re using Ableton Live, but any DAW that has the ability to map track level and mute to MIDI will work. I used Ableton’s built-in MIDI learn capabilities to create a template, using Utility to control track level via Xer Mixa’s faders, and mapped the XM track mutes to the track mutes in Ableton.

If you’re using Ableton Live, too, you can download the template here. All you’ll need to do is assign each track to either the mono or stereo input(s) on your audio interface and you’re ready to record!
Mixing
Once you’ve recorded your performance, each track will have its mutes and level changes recorded into the session, too. Xer Mixa doesn’t send out MIDI for pan position, so you’ll have to adjust that in the mixing stage.
Advantages of using MIDI for recording multitrack
The big advantage of this technique is that since the level adjustments and mutes made during a performance are all stored in MIDI, not baked into the audio itself, we can adjust them after recording. Muted a track a bar too late? Adjust the MIDI in the session and it’s not a problem! Kick drum fade in too slowly or too loudly? Easy to fix.
Another advantage is that you avoid the increased SNR that comes with postfader recordings. With a prefader recording and MIDI automation in the DAW, your recording will be less noisy and will sound better.
And, of course, since it’s a multitrack recording, each individual track can be treated with whatever processing it needs to sound its best. When you render your session, all the adjustments made with MIDI will be rendered, too, so your performance will sound just like it did when you recorded it – only better.
Here’s an example of a recording we did in Ableton using this technique. Download the template here to try it yourself!


